Using your local machine
Installation Steps
Prerequisites
- GNS3 installed on your system.
1. Download DENT NOS Files
Visit the DENT NOS repository on OneDrive to download the required files: DENT NOS Files.
2. Uncompress Disk Image
Uncompress the downloaded disk image file.
3. Import Appliance to GNS3
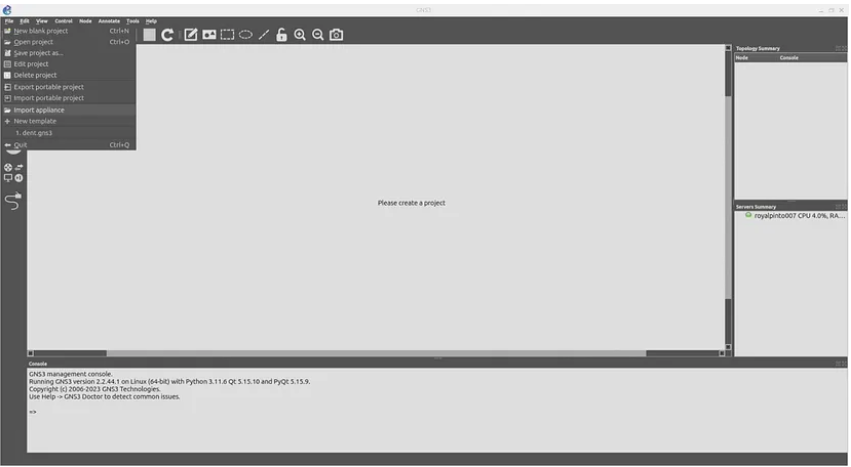
a. Open GNS3 and go to File -> Import Appliance.
b. Select the GNS3 appliance file (gns3a file) you downloaded from the OneDrive link.
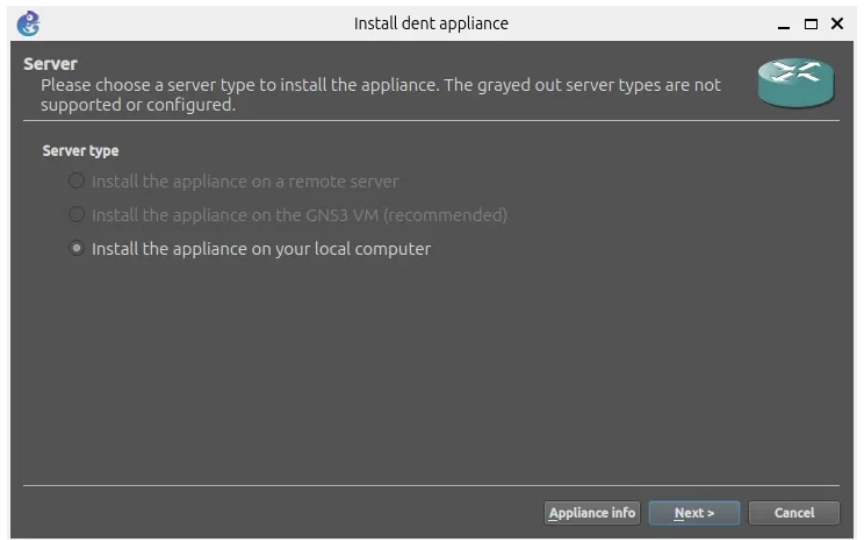
c. Choose the server on which to run the appliance.
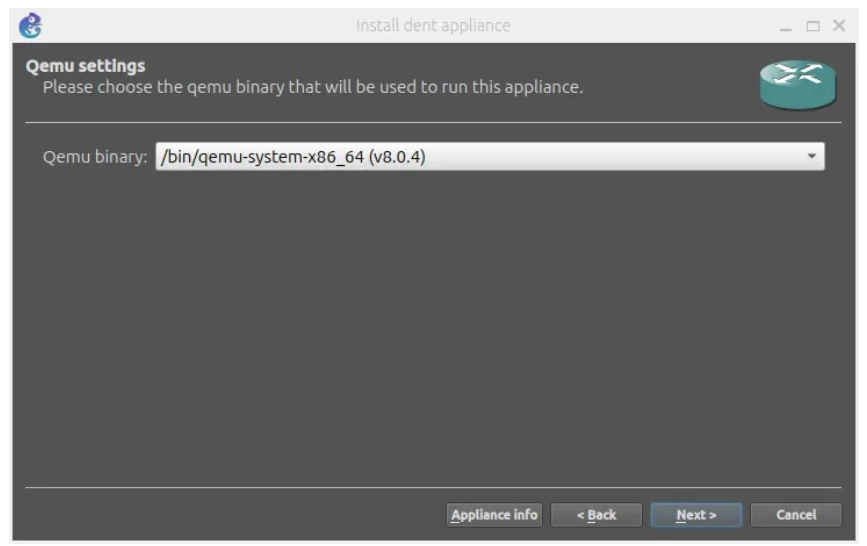
4. Choose QEMU Binary
a. Choose the QEMU binary that will be used to run the DENT NOS appliance.
b. The recommended option is /bin/qemu-system-x86_64 (v8.0.4).
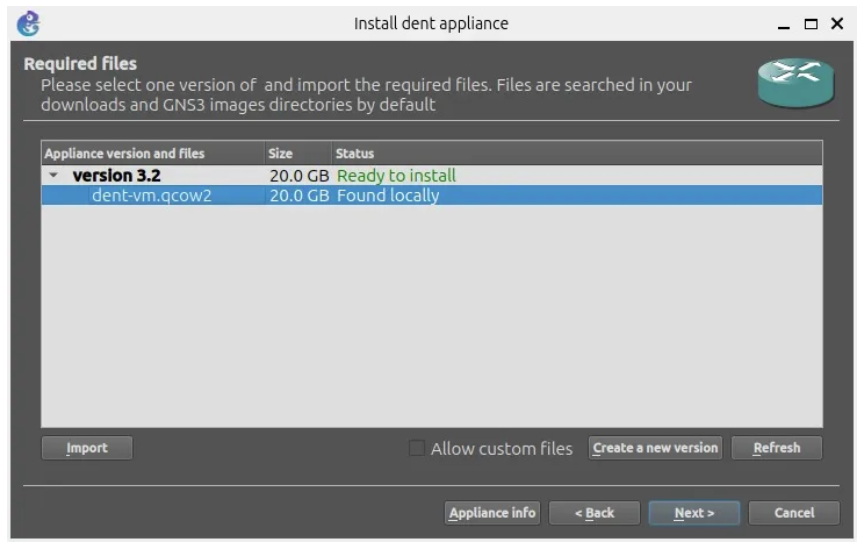
5. Import DENT NOS Image
a. Click on the DENT NOS image file and import it.
b. Wait for the upload to finish; this may take some time.
6. Confirm Installation
a. You will be prompted with an installation confirmation.
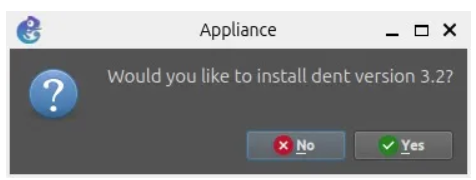
b. Click “Yes” to confirm the installation.
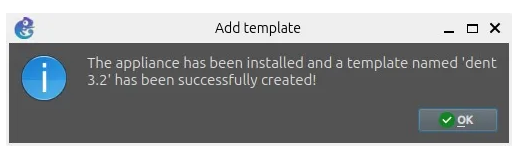
Congratulations!
You have successfully installed DENT NOS on GNS3.
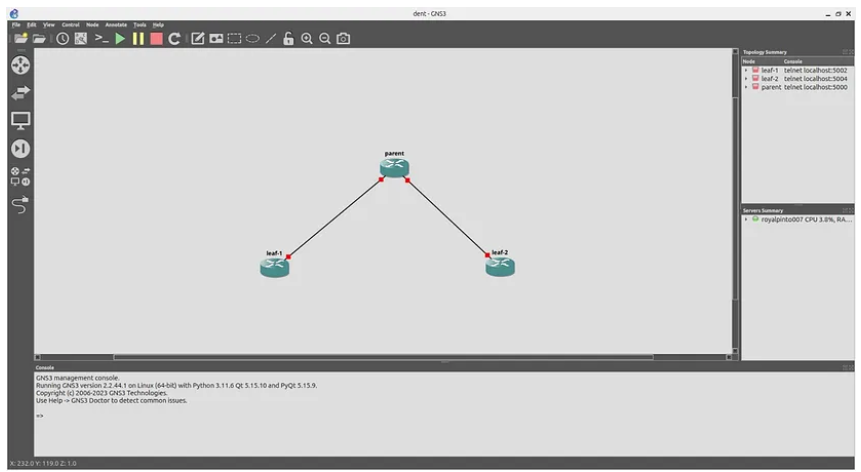
Start Using DENT NOS in GNS3
a. Drag the DENT NOS appliance into the main window of your GNS3 project.
b. Create your network topology, adding DENT NOS appliances as needed.
c. Right-click on each appliance and select “Start” to initiate the simulation.
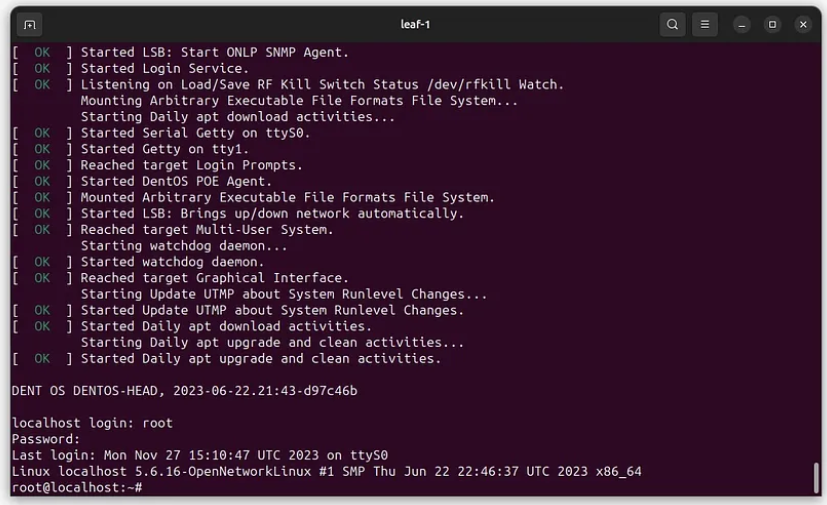
Default Credentials
DENT login: root
Password: onl
For more information, you can visit dent.dev.